Butternut Squash and Apple Soup

This is one of the easiest recipes I know, 5 main ingredients not counting any seasonings and easy to make ahead and it freezes wonderfully. It’s also easy to double or triple. What more could you ask? Ok, yeah, someone else to make it for you.

Ingredients:

  • 1 butternut squash approx 2-2.5 lbs
  • 1 large or 2 medium onions
  • 2 apples, tart, firm apples like Granny Smiths work great
  • 3 cloves of garlic
  • 4-5 cups of stock, either chicken or vegetable
  • 2 Tbsp of oil to roast your ingredients
  • Salt and pepper to taste

Directions:

  1. Preheat oven to 350 degrees and cover a baking dish or cookie sheet with a lip with foil for ease of cleaning.
  2. Cut butternut squash in half lengthwise and scoop out seeds
  3. Peel and quarter the onions
  4. Half and core the apples
  5. Separate the garlic cloves from the bulbs but keep the skins on they will roast in their skins.
  6. Oil the bottom of the pan to prevent sticking and toss the onions with the remaining oil. Put everything in your pan in a single layer.
  7. Roast for 30-40 minutes until you can pierce the squash with a fork easily. The apples will take less time, 15-20 minutes, using a spatula you can remove them from your pan and set aside to cool.
  8. Let everything cool so you are able to handle the squash. Scoop the pulp from the squash and apples from their skins and squeeze or peel the garlic from their skins.
  9. You have a couple of options to puree your soup. You can add half the roasted ingredients and 2 cups of stock into a blender and puree until smooth and then do the other half. OR, if you have an immersion blender (BEST THING EVER!) put all the ingredients into a pot, add your stock and puree in the pot.
  10. If the soup is too thick you can thin with more stock and add any salt or pepper to taste if needed.

Variations

  • Just about any sort of winter squash will work in this soup, acorn, hubbard or buttercup. I also think sweet potatoes could also work.
  • Adding one to two tsp of curry powder can add some zip to this. Less is more, start with one and see how it tastes.

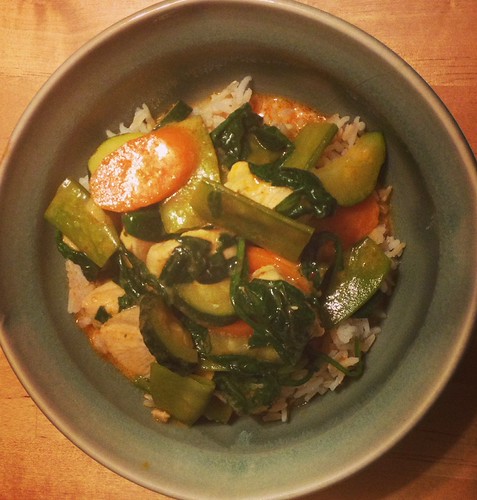
Red curry with chicken and vegetables

Making curry has replace stir frying for me. Perhaps its the cooler fall temperatures that has me craving something a bit more soup-like with some spicy heat. I used to think curry was really hard to make but with all the different pastes available now all you need to add is coconut milk, fish sauce, a bit of brown sugar along with your protein and vegetables and in 30 minutes or less you have CURRY!

In this dish I used chicken breasts, carrots, zucchini, snow peas and spinach. The simple parameters for a recipe I list below will serve approximately 4 people. Remember, these are only parameters, if you have more or less of something play around and see how it works out. A squeeze of lime juice, garnish with basil or if you want to watch your fat consumption, light coconut milk will work just fine, your curry will just be a bit more watery.

Ingredients

  • 1-1.5 C of protein cut up into equal size. If it’s meat, 1″ cubes work great.
  • 2-3 C vegetables cut into equal sizes. If you are making this vegetarian without adding any protein I’d bump up the amount of vegetables to at least 4 cups.
  • 2 tsp of oil

Curry sauce

  • 1-1.5 Tbsp curry paste, red, green, panang, etc. You can add more or less to taste.
  • 1 can coconut milk
  • 2 Tbsp fish sauce**
  • 1-2 Tbsp brown sugar or coconut sugar

Directions

  1. Heat your oil in the pan, medium high heat
  2. Add your meat protein first if using that, cook through, 5-7 min
  3. Add your vegetables, cook for 2-3 minutes
  4. Add your curry paste and mix well and cook for 1 minute
  5. Add your coconut milk, fish sauce and sugar, stir, lower heat to medium. Cover and cook for 10-15 minutes until your vegetables soften.
  6. Taste to see if you need more heat (curry paste), salt (fish sauce) or sweet (sugar)
  7. Spoon over cooked rice, jasmine or basmati are my favorites.

**Vegetarian substitutes for fish sauce – Golden Mountain Sauce or soy sauce which are not gluten free. Tamari and Bragg’s Amino’s are gluten free. FYI – most “premium” fish sauces are gluten-free.

Vegetable Green Curry with Brown Jasmine Rice

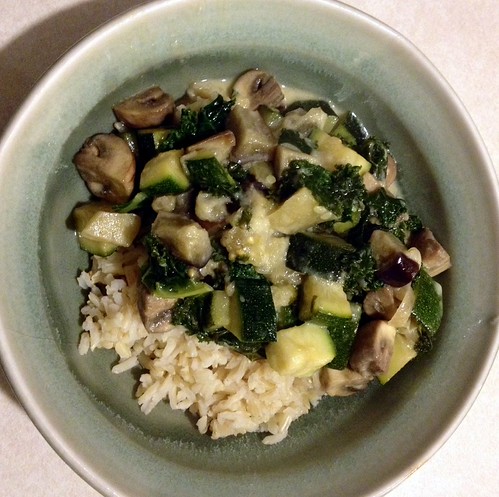
Cleaning out the fridge and garden again for dinner. With the cooler weather setting in now that it’s officially fall I had a craving for curry. I took a couple of Japanese eggplant from my patio garden, a couple of zucchini, mushrooms and kale from my refrigerator to make dinner. This recipe can use whatever you have on hand and if you want more or less of a vegetable please feel free to substitute. If you still have fresh basil in your garden, some basil leaves torn and added right at the end would be a great addition!

Ingredients

  • 2 medium Japanese eggplant (peel if the skin is tough), diced
  • 2 small to med zucchini, diced
  • 1 shallot, sliced
  • Half a bunch of kale, leaves torn in bite sized pieces only stems removed
  • 6-7 mushrooms cut into fourths
  • 2 tsp of oil
  • 1-1.5 Tbsp green curry paste
  • 1 can coconut milk
  • 2 Tbsp fish sauce**
  • 2 Tbsp coconut sugar or brown sugar

Directions

  1. Heat your 2 tsp of oil in a pan under medium high heat
  2. Saute eggplant, zucchini, shallot and mushrooms for 6-7 minutes until they start to soften
  3. Add green curry paste and cook for 1 minute
  4. Add can of coconut milk, fish sauce, and sugar and bring to simmer and reduce heat and cook for 10 minutes covered. Add kale 5 minutes into the cooking
  5. Taste to see if you need more fish sauce, curry paste or sugar
  6. Spoon over cooked rice and enjoy!

**Vegetarian substitutes for fish sauce – Golden Mountain Sauce or soy sauce which are not gluten free. Tamari and Bragg’s Amino’s are gluten free.

Roasted Radishes

I remember growing radishes as a kid since they were the easiest and fastest germinating plant but had no interest in eating them back then. I now love the occasional crunch of sliced peppery radishes on a salad but for the most part I could take or leave them. That was until I saw a picture of them roasted on a friend’s Facebook feed, I was intrigued.

Super simple delicious way to make them, roasting mellows the peppery bite and turns them sweeter with a deeper flavor. I used this recipe from Bon Appetit and riffed on it a bit, using lemon olive oil and some fresh thyme.

I could see using this as a side, ingredient in a salad, added to other roasted vegetables. If your CSA basket runneth over, here’s an alternative!

20130902-150434.jpg

Tomato Soup

Summer is slowly fading to fall here in the Pacific Northwest though many are in denial, not wanting to lose their summer sunshine. It’s rained the last couple of days and that makes me want to cozy up under a blanket with a book and have some soup.

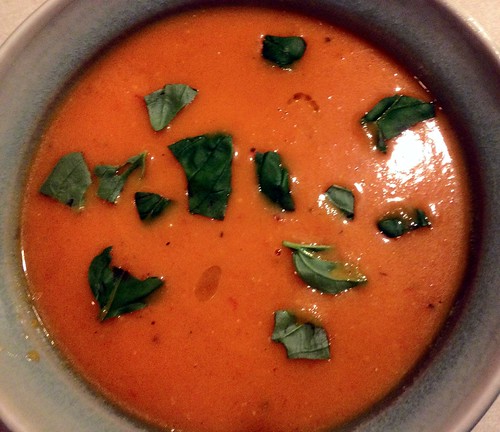
I created the best of both worlds tonight, warm tomato soup with a burst of summer time flavor.

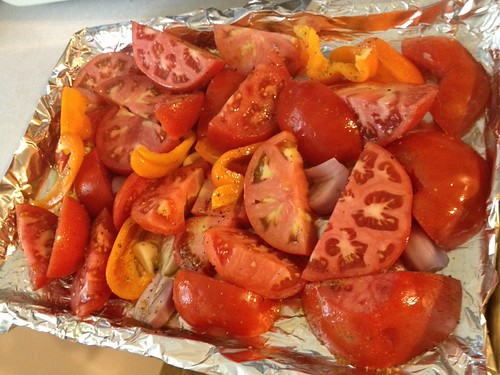
3.5 lbs of tomatoes (fresh from the farmer’s market), one orange pepper, 2 shallots, 5 cloves of garlic, olive oil, salt and pepper roasted at 375 degrees for 40 minutes.

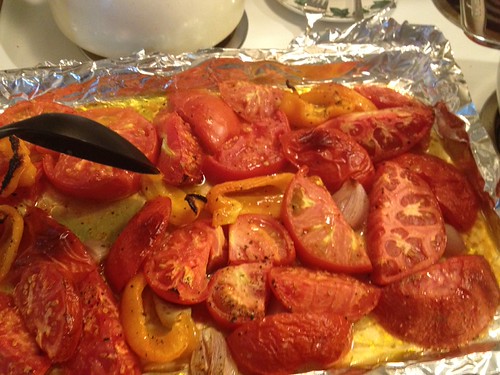
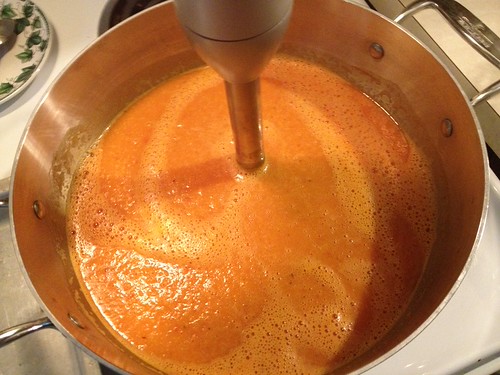
Cooked down the tomatoes and it’s compatriots in the pan look like this. Now you have two options to puree, either scooping some of this in a blender and doing in batches, reminder, it’s hot, remove the center area of the lid of your blender to allow steam to escape, cover with a towel to prevent a mess. Or if you have an immersion blender, move everything including any pan juices to a saucepan that will fit it all. Add 1-1.5c of stock, and start blending.

I added a 1/4 tsp of cumin, some Italian herb blend and a tsp of sugar while I was blending. Taste your soup and see if it needs more salt, pepper or anything else you desire.

I ladled mine into a bowl, tore a couple of basil leaves and added a splash of basil olive oil, my burst of summer balance with some warm comfort of fall.

Vinn Distillery – Mijiu, Baijiu & Vodka Tasting

A Portland Perks deal led me to Vinn Distillery in Portland’s Distillery Row. Vinn Distillery is a local Oregon family run business, the name “Vinn” derived from the middle name that all five of the siblings share. Their distillery is located in Wilsonville and their tasting room, open on the weekends, in Distillery Row.
What intrigued me about Vinn is that all their liquor is distilled from rice, hence it’s all gluten free. Sake is about the only experience I had with alcohol made from rice and I haven’t had any experience with distilled spirits. The tasting was educational and interesting, learning about the family history as well as the process of how each product came about.

There were four products that were served along with two mixed cocktails using their products. Mijiu Ice reminded me a bit of sherry, smooth and slightly sweet. Mijiu Fire is earthier and spicier than the Ice. It’s not like anything I had ever tasted before I found it hard to wrap my brain around what I was tasting but I really liked it. Their Vodka is made to be a sipping vodka that you could drink straight up or on the rocks. There was a clean but slightly sweet flavor and it finished smooth, nothing harsh about this vodka at all. Baijiu is similar to vodka but with much more character. The floral notes in the nose really surprised me and it was a really complex with sweet, sour and elements of subtle earthiness.

The cocktails they served introduced me to a couple of new products that I think I am going to add to my mixed cocktail recipe book. The first was a Honey Som make with the Vinn Vodka, Pok Pok Som Honey Drinking Vinegar, club soda and basil. It was so refreshing! The tartness of the drinking vinegar intermingled with the fresh basil was perfect for a hot summer day. The Baijiu Bloody Mary was delicious; Baijiu, tomato juice and J. Wilbur Bloody Mary Flavoring (also gluten-free) made one of the best Bloody Mary’s I have tasted.

I went home with a bottle of Mijiu Fire and Baijiu that day and a few ideas for cocktails to enjoy before the summer ends here in the Pacific Northwest.

Summer Soup

I found this recipe on Tasting Table for a Melon Basil Soup with Cucumbers Pimenton. It’s a simple and refreshing summer soup. It reminds me a bit of a green smoothie.

Grilling…lettuce?!?!

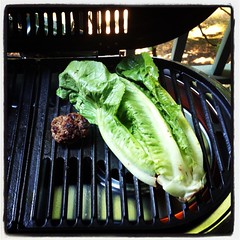
Yes lettuce, romaine to be exact. Sunday night was grill-a-palooza, great way of cooking a whole bunch of food for the week and not heating up my place. I started by grilling some zucchini I picked up a the farmer’s market, moved onto making small burgers using ground buffalo and used “kofta” style spices. Then grilling an head of romaine lettuce as the base of my dinner salad.

I am not sure who thought of trying to grill lettuce but I am so glad they did. I have had grilled Caesar salads at restaurants but had no idea how easy it is to do at home.

Ingredients

  • 1-2 heads of romaine or more depending on how many people you are serving. I’d use half a head per person as a “dinner” salad with additional fixings and some sort of protein
  • Olive oil
  • Salt/Pepper

Directions

  1. Wash and pat dry your lettuce, remove any ugly leaves. Trim the bottom stem but do not cut off, this holds your half lettuce heads together for grilling.
  2. Preheat grill or grill pan to medium high heat
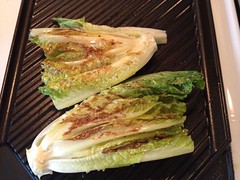
  3. Cut the head of romaine in half, brush or drizzle both sides with olive oil and grill starting cut side down for 2-3 minutes. You will get grill marks on the lettuce and it will wilt slightly. Turn over and grill back for another 2-3 minutes. Time may increase/decrease on how large your lettuce is as well as the heat of your grill.

You can simply season the grilled romaine with salt and pepper to taste or add a vinaigrette with other salad fixings, fresh tomatoes, cucumbers, carrots, etc.

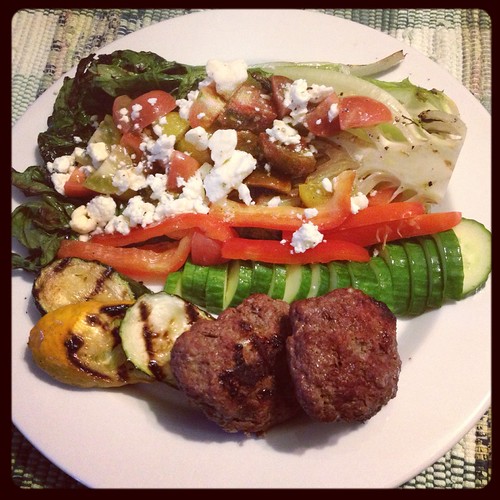
Here was my dinner; grilled romaine with heirloom tomatoes, red pepper, cucumbers, feta cheese, homemade vinaigrette, grilled zucchini and kofta style buffalo burgers.

Dinner, yum!

Clean out the fridge frittata

20130731-192056.jpg
What to do for dinner? Have some eggs? Frittata!!!

In this frittata: zucchini, red bell pepper, mushrooms, onion, garlic, sliced oven roasted turkey lunch meat, one slice of provolone cheese, three slices of prosciutto crisped first in the microwave, artisan cheddar cheese.

Sauté your veggies in some oil until soft, add any seasoning, add the meat to warm, dot top with cheese, scramble eight eggs and pour over the goodies. Let eggs set for a bit on the stovetop then pop into a 450 degree oven for 5-7 minutes to cook the top.

I used a 12″ pan, if you use an 8″ pan you may only need six eggs.

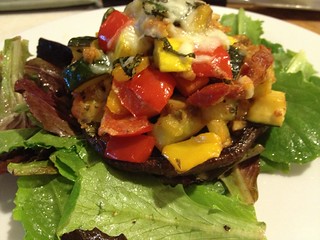
Stuffed Portobello Mushroom

Summer vegetables are at their peak and super tasty right now but you can always get zucchini and some sort of squash year-round if you are wanting a bit of summer when the temperature drops. Inspired and reconstructed from a dish at a restaurant this is a simple and tasty way to create a great topper to some salad greens or wonderful side dish.

Stuffed Portobello Mushroom on Greens

Ingredients*:

  • 2 large portobello mushrooms
  • 1 small to medium zucchini
  • 1 small to medium summer squash or golden zucchini
  • 1/2-1 red bell pepper
  • 5-6 mushrooms
  • 3 tbsp sundried tomatoes cut into strips (with or without oil)
  • handful of cherry tomatoes
  • 1 shallot
  • 3 garlic cloves
  • balsamic vinegar
  • olive oil
  • fresh basil
  • Parmesan cheese
  • Mozzarella cheese
  • Dried herbs – oregano, basil, thyme, rosemary OR italian spice blend
  • Salt and pepper to taste

Directions:

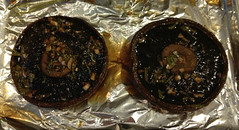
  1. Rinse or brush any soil off the portobello mushrooms and using a sharp knife, cut the stems out of the center. If they are woody, discard/compost, if not cut into 1/4″ dice. Put mushrooms on a plate or dish to marinate, gill side up.
  2. Make a quick marinade of one minced garlic clove, 5-6 basil leaves sliced thin (chiffonade), 2 tbsp of balsamic vinegar, 4 tbsp of olive oil and salt/pepper to taste. If you have other seasonings you like feel free to play! Give your marinade a good stir to blend the oil and vinegar and pour over the portobello mushrooms and let set at room temperature for 15-30 minutes.
  3. Preheat oven to 350 degrees. Meanwhile, time to dice some vegetables.
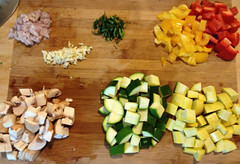
  4. While your portobellos are marinating, mince the remaining garlic cloves and shallot. Cut into 1/4″ dice the zucchini, summer squash, pepper and mushrooms. Half the cherry tomatoes.
  5. Put the portobellos in the oven for 15 minutes to cook.
  6. Heat a skillet over medium high heat. If you are using sundried tomatoes in oil put those in the skillet along with the shallots and garlic, saute until shallots are translucent. If you are using sundried tomatoes that aren’t in oil, add 2 tsp of olive oil to the pan before sauteing. Add a tbsp of dried herbs and a 1/4 tsp of fresh ground pepper and saute for 1 minute to release the aromatics.
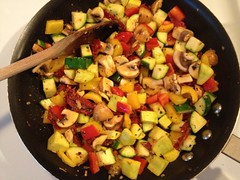
  7. Add zucchini, peppers, squash and mushrooms to the pan and saute until softened. Add cherry tomatoes and saute for a minute to two to warm tomatoes through. Remove from heat. Add a 1/4 c of Parmesan cheese to the sauteed vegetable and stir. Sometime in this your portobellos should be done, remove from the oven but leave oven on for one final heat through.
  8. Now time to get a little messy, or not. After you have removed the portobellos from the oven, they will need their veggie topping. You can either spoon on the sauteed vegetables into a pile on each mushroom or you can be all restaurant-like mold your veggies before putting them on the portobellos. Get a small bowl that is the same diameter as the mushroom, pack the veggies in there and then turn out on the portobellos. I hate dirtying more dishes than need be unless I am feeling the need to make it pretty so I usually just spoon it on.
  9. Sprinkle the top with a tbsp of mozzarella and back in the 350 degree oven for 7-9 minutes to warm throughout and melt the cheese.

*Notes:

  • I have tried to help with timing management with the steps as if you are making the dish.
  • If you are only making two portobellos I have found using my large toaster oven works well and you don’t heat up your kitchen for a small dish.
  • You can precook everything and just assemble and heat the day of your meal, bring everything to room temp and just do the final heat through it the oven for 10-15 minutes to heat everything through. Leave out the Parmesan cheese from the vegetable saute until you are right about to put on the portobellos, if not it will discolor and be sticky.
  • The amount of vegetables are always negotiable, have more of one thing or another? Cleaning out the fridge? Use what you have on hand.
  • You will probably have some vegetable saute left over, I toss it with scrambled eggs or in an omelet the next day.
  • Dairy-free or vegan? Leave out the cheeses. The vegetable saute may not hold together as well but it will still be delicious!
Design a site like this with WordPress.com
Get started